| |
|
|
|
Materials Required:
|
 |
|
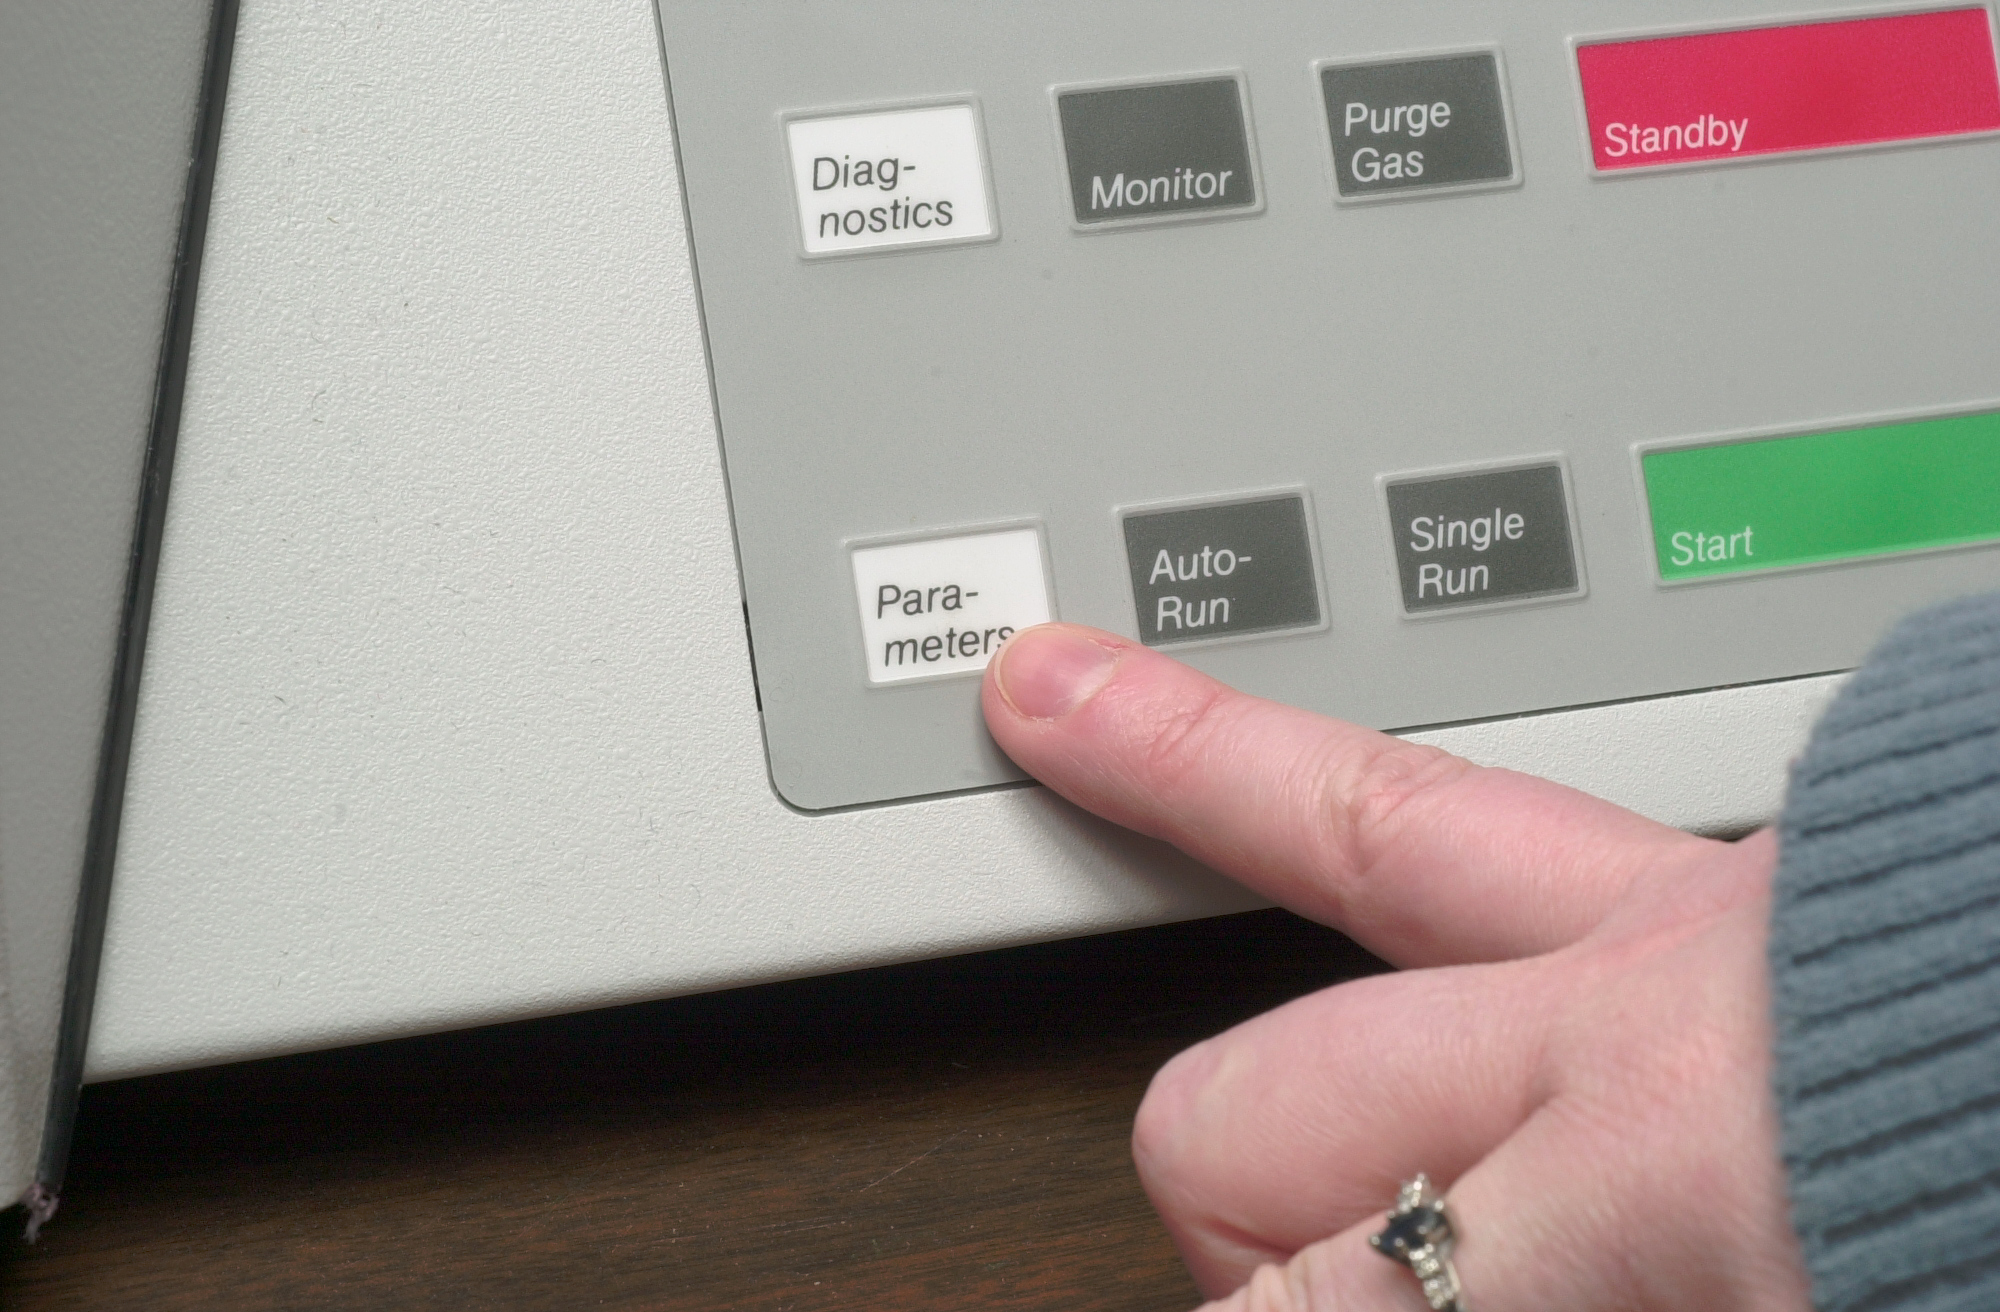
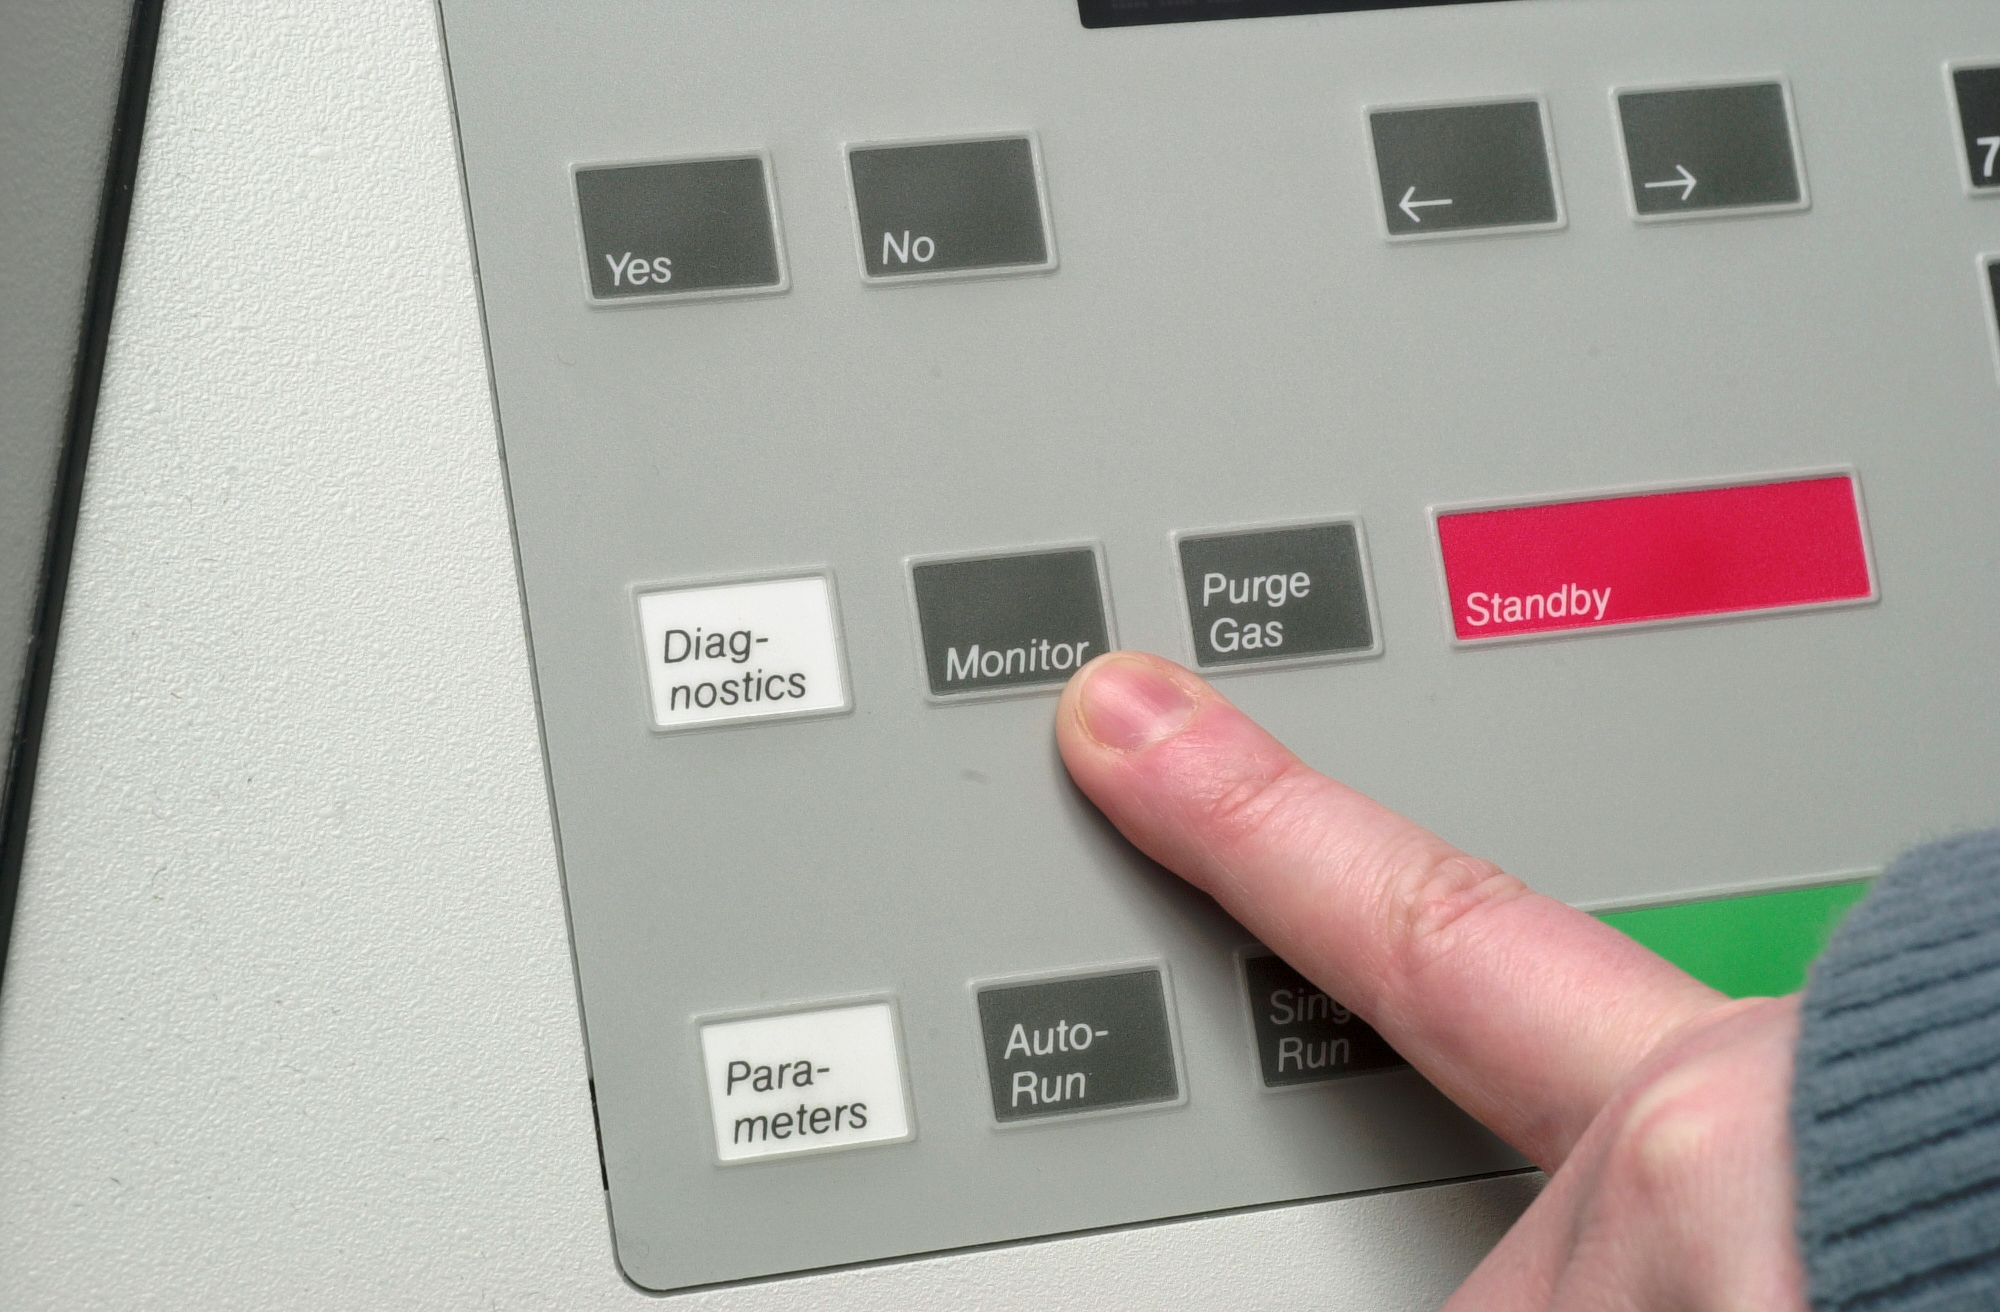
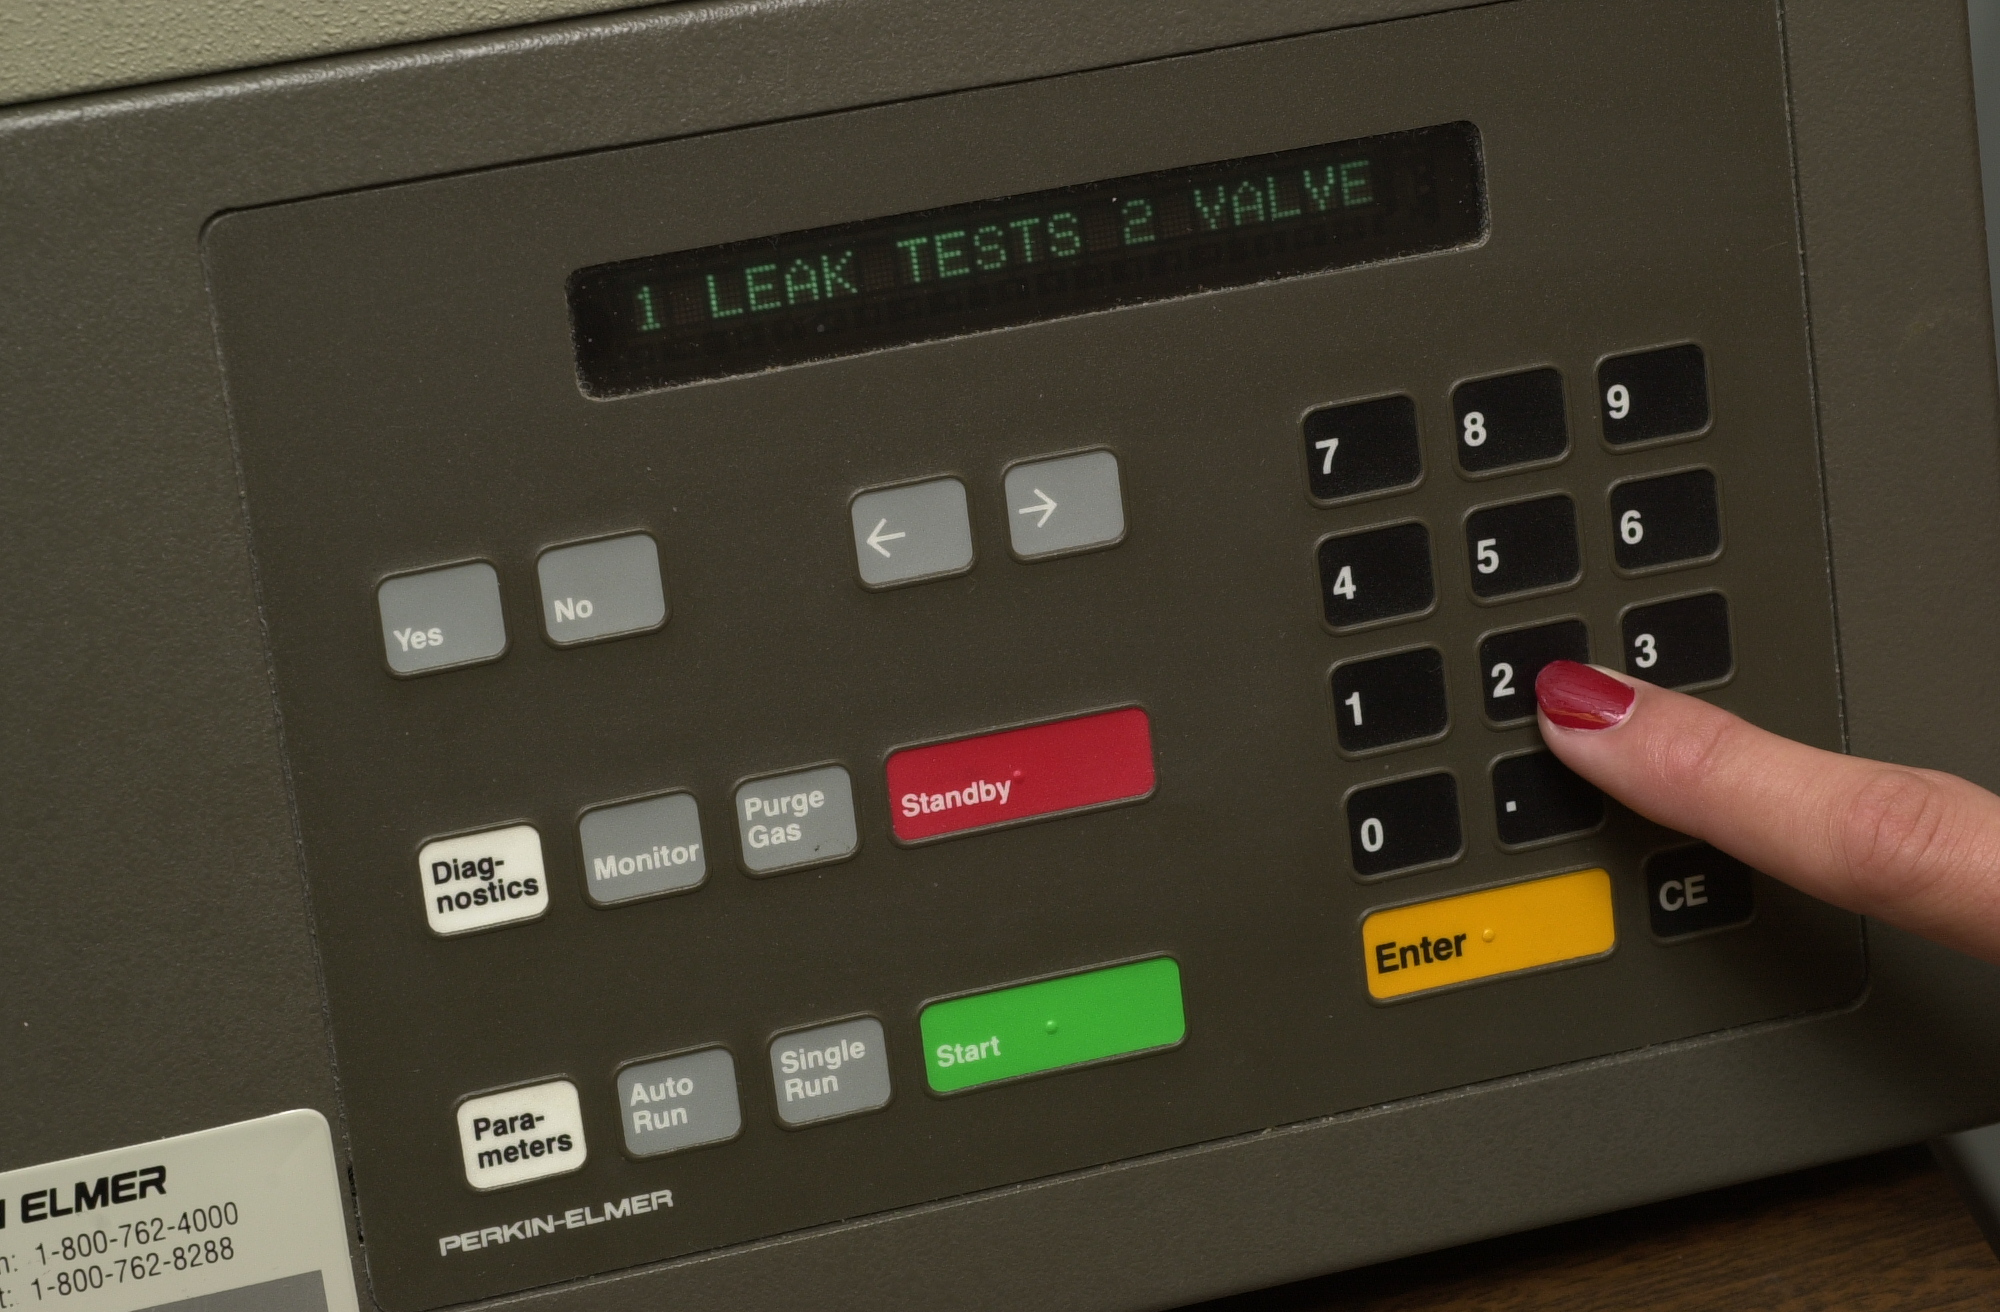
Turn the furnace off by pressing PARAMETERS 12 and then 2 for OFF. The furnace will take several hours to cool enough to be able to handle the tubes, so it is best to turn it off before leaving work so it will be ready the next morning. To check the temperature, press MONITOR and YES to print the list. |
 |
|
Once the furnace has cooled, open the furnace door by turning the securing screw using the back of a micro forcep.
|
 |
|
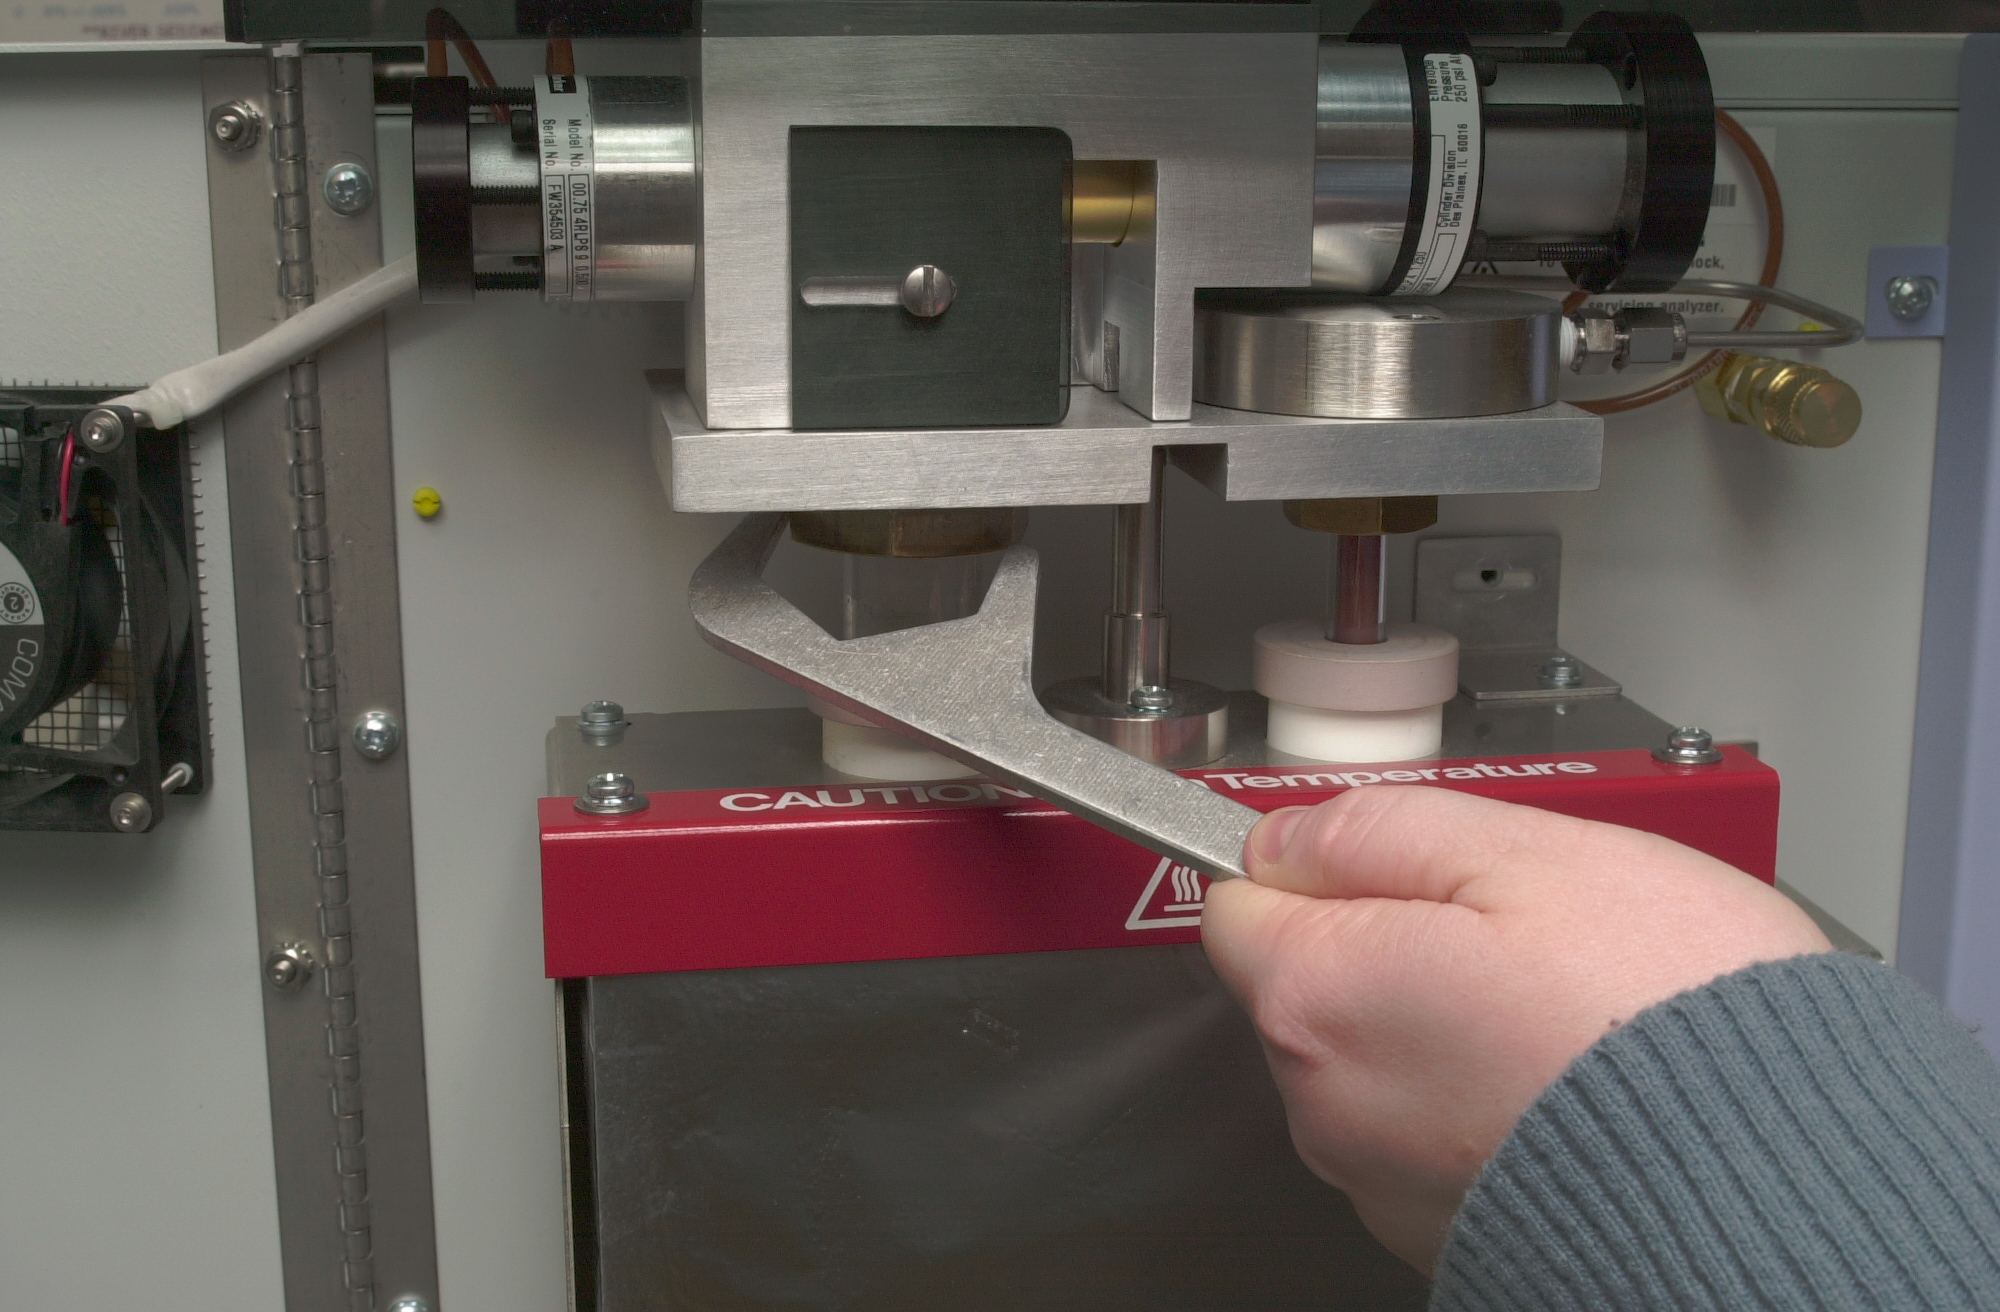
Use the 11mm and the 25mm wrenches to loosen the nuts both at the top and the bottom of both the tubes. |
 |
|
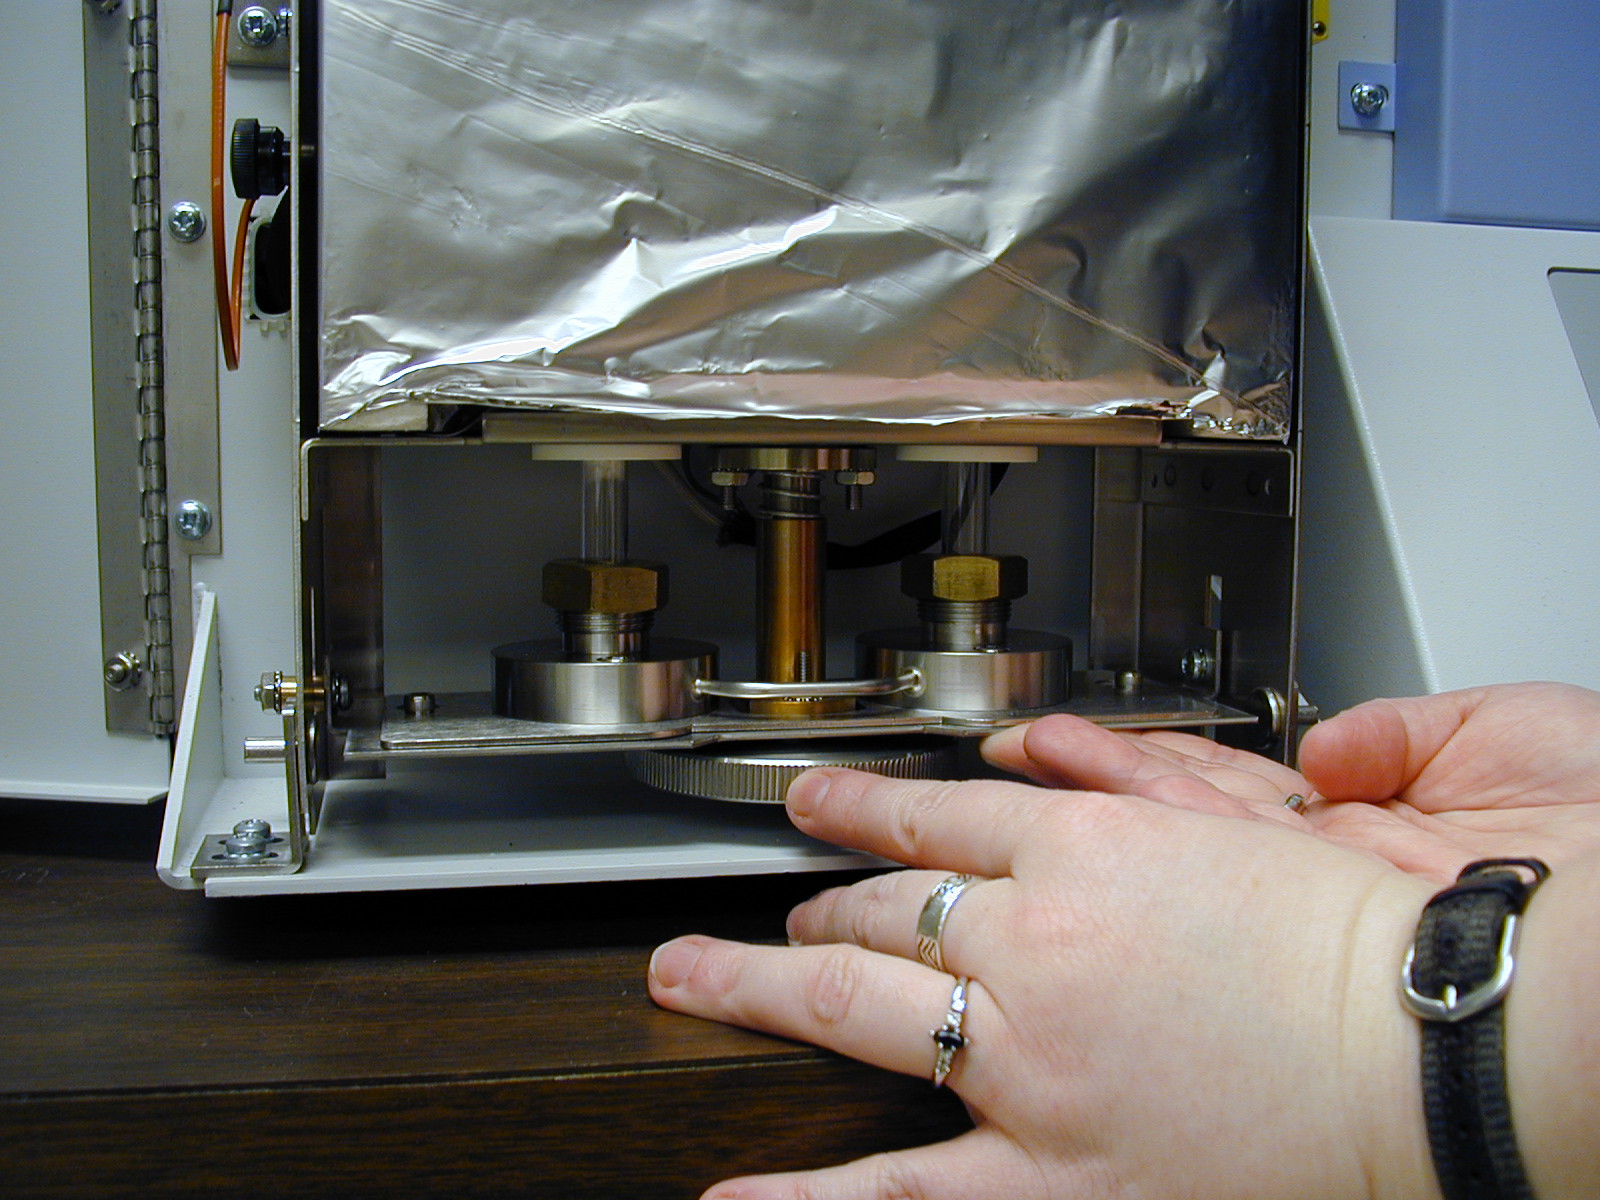
While holding the bracket plate below the tubes, turn the wheel as far as it can go and then lower the bracket plate until it is resting on the bottom of the furnace area. |
 |
|
Loosen the furnace securing knobs which are black and located on either
side of the furnace. Tilt the furnace forward so you can now see the tops of the tubes and secure the black knobs to hold it in place. |
 |
|
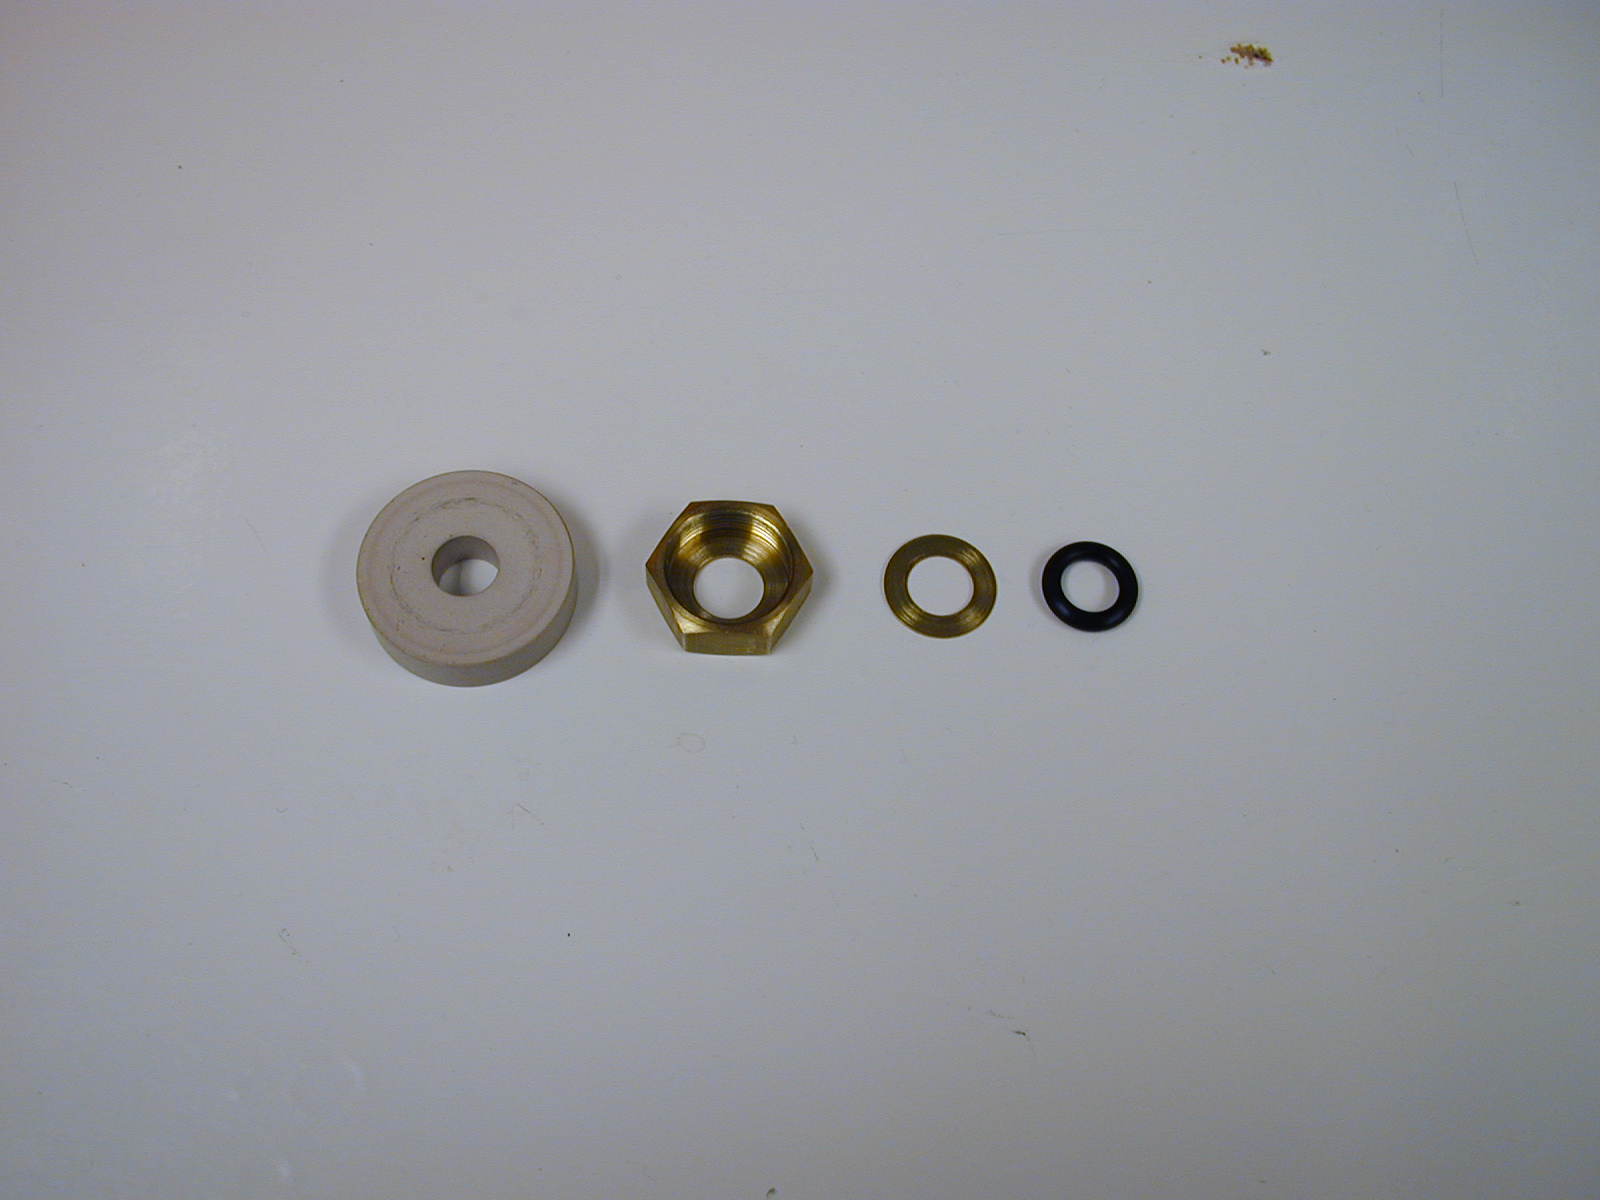
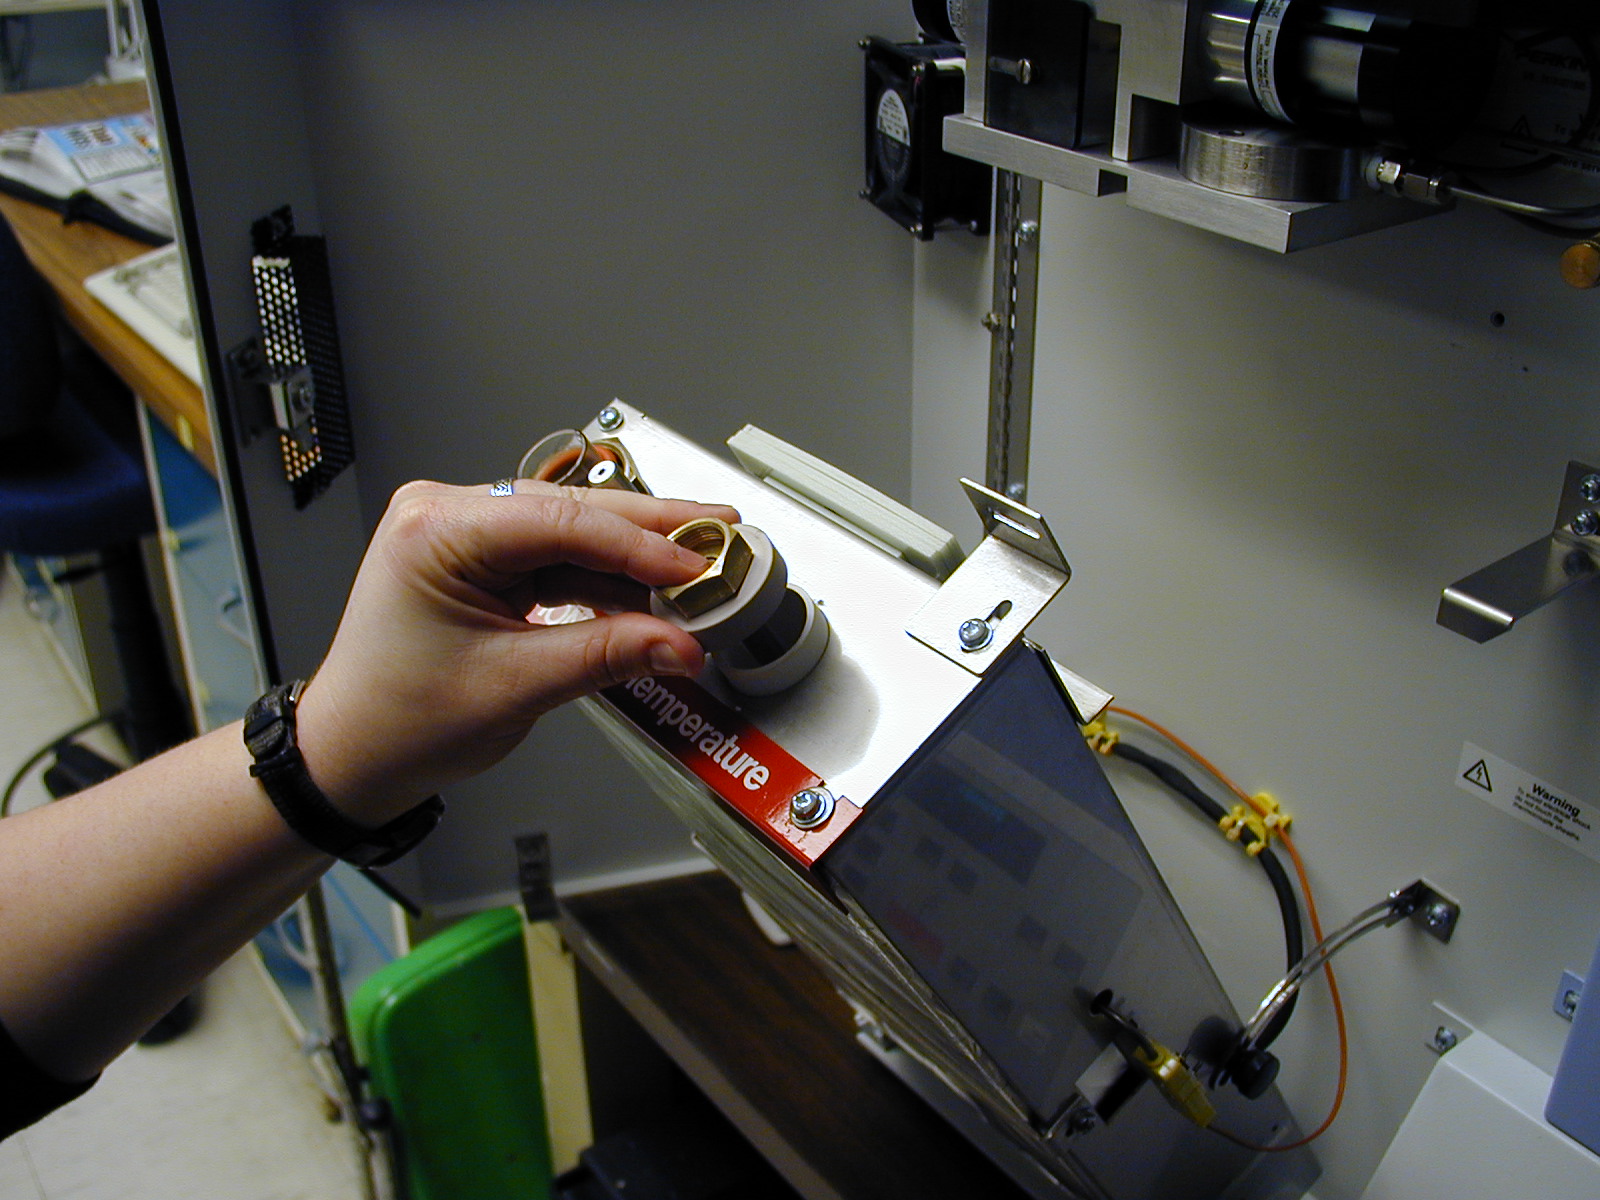
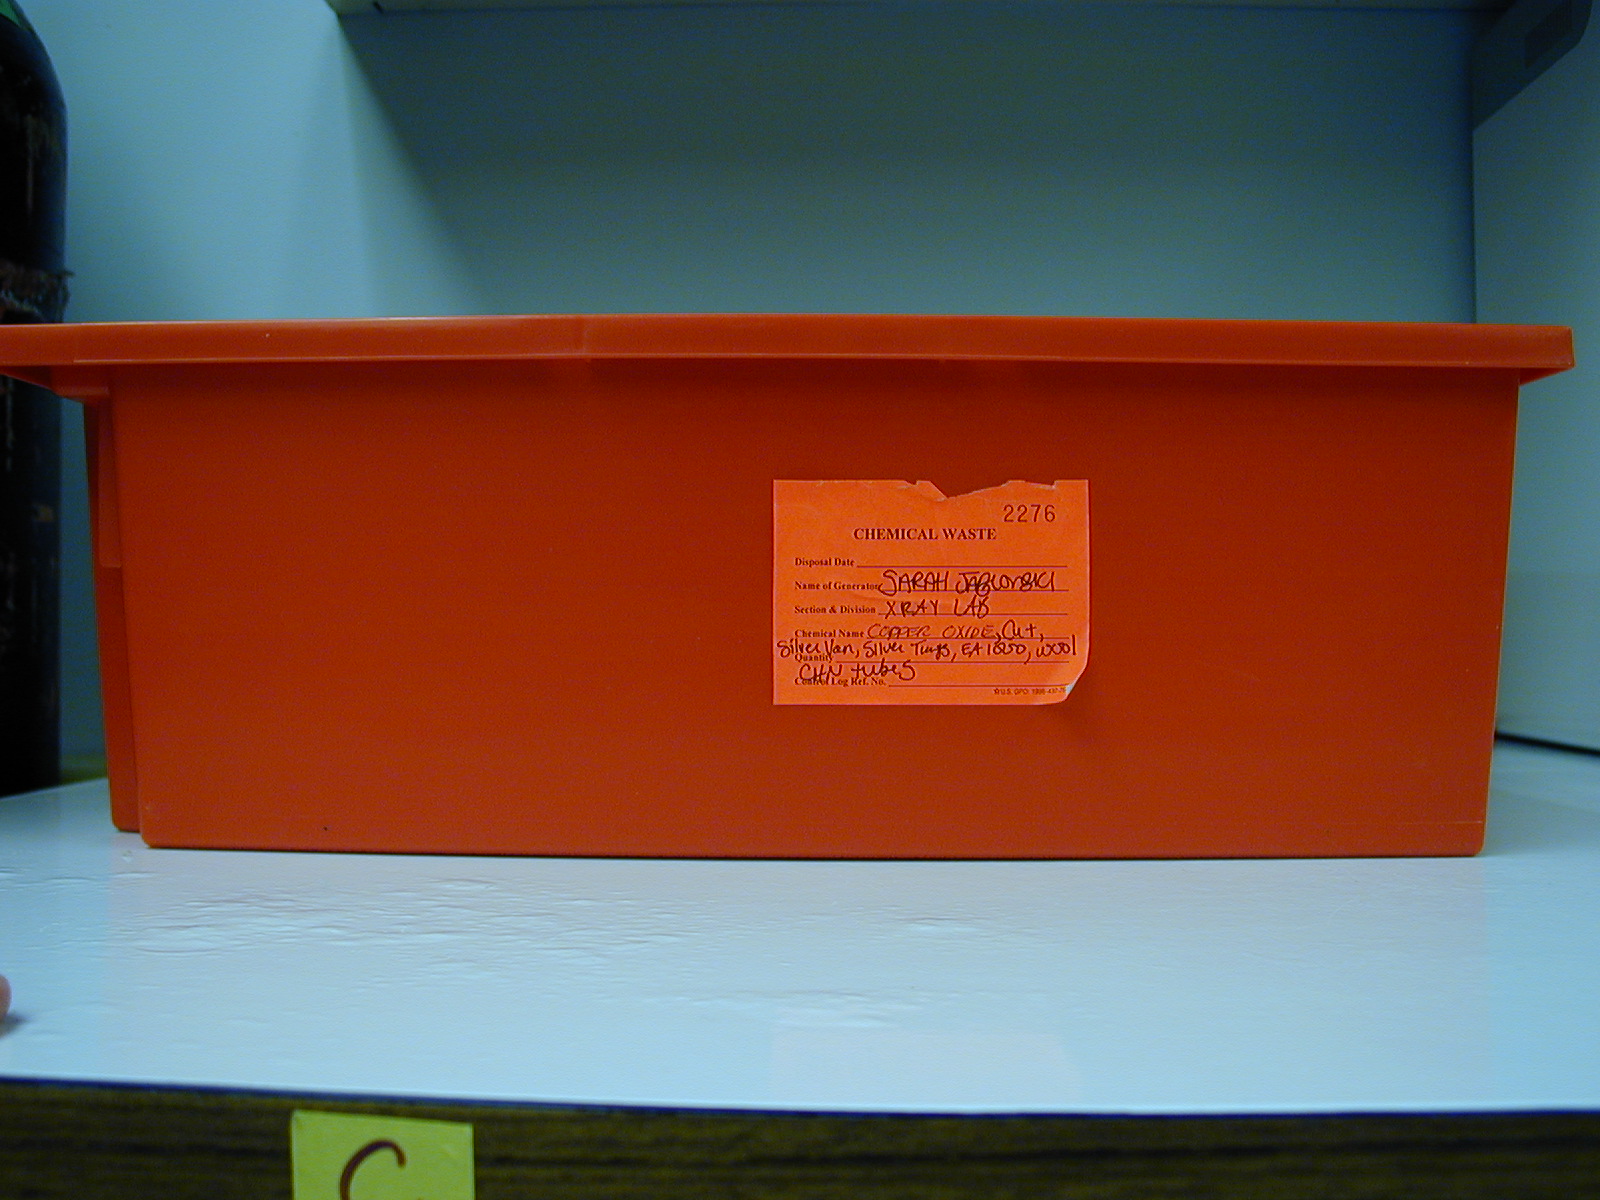
Remove the nut, washer, ceramic ring, and O-ring from the top and bottom of the Reduction tube which is the tube on the right.
|
 |
| Carefully
remove the old Reduction tube from the furnace, remove the copper diffusion
plug from the top of the old tube as well as the roll of silver gauze from
the bottom of the tube.
Place the old tube in the proper waste receptacle. |
 |
|
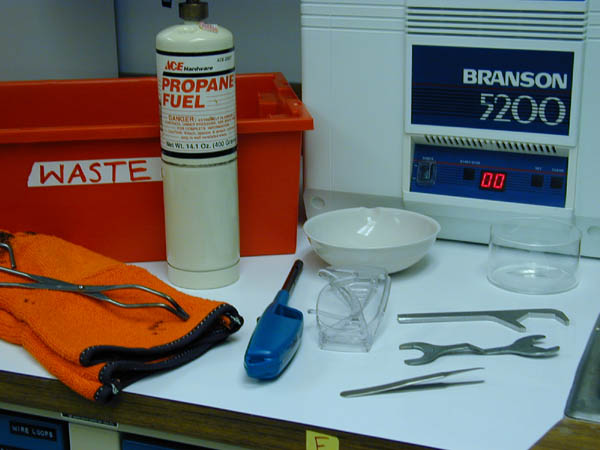
Insert the copper diffusion plug into the top of the newly made Reduction tube so it rests on the quartz wool. Clean the silver gauze by first sonicating and then flaming with a propane torch to remove impurities before placing it in the new tube. The silver gauze helps filter the gas used during analysis. To sonicate, place silver gauze in a petri dish, fill dish with Milli-Q, fill sonicator with 1 inch of tap water, and place dish in sonicator for 10 minutes. |
 |
|
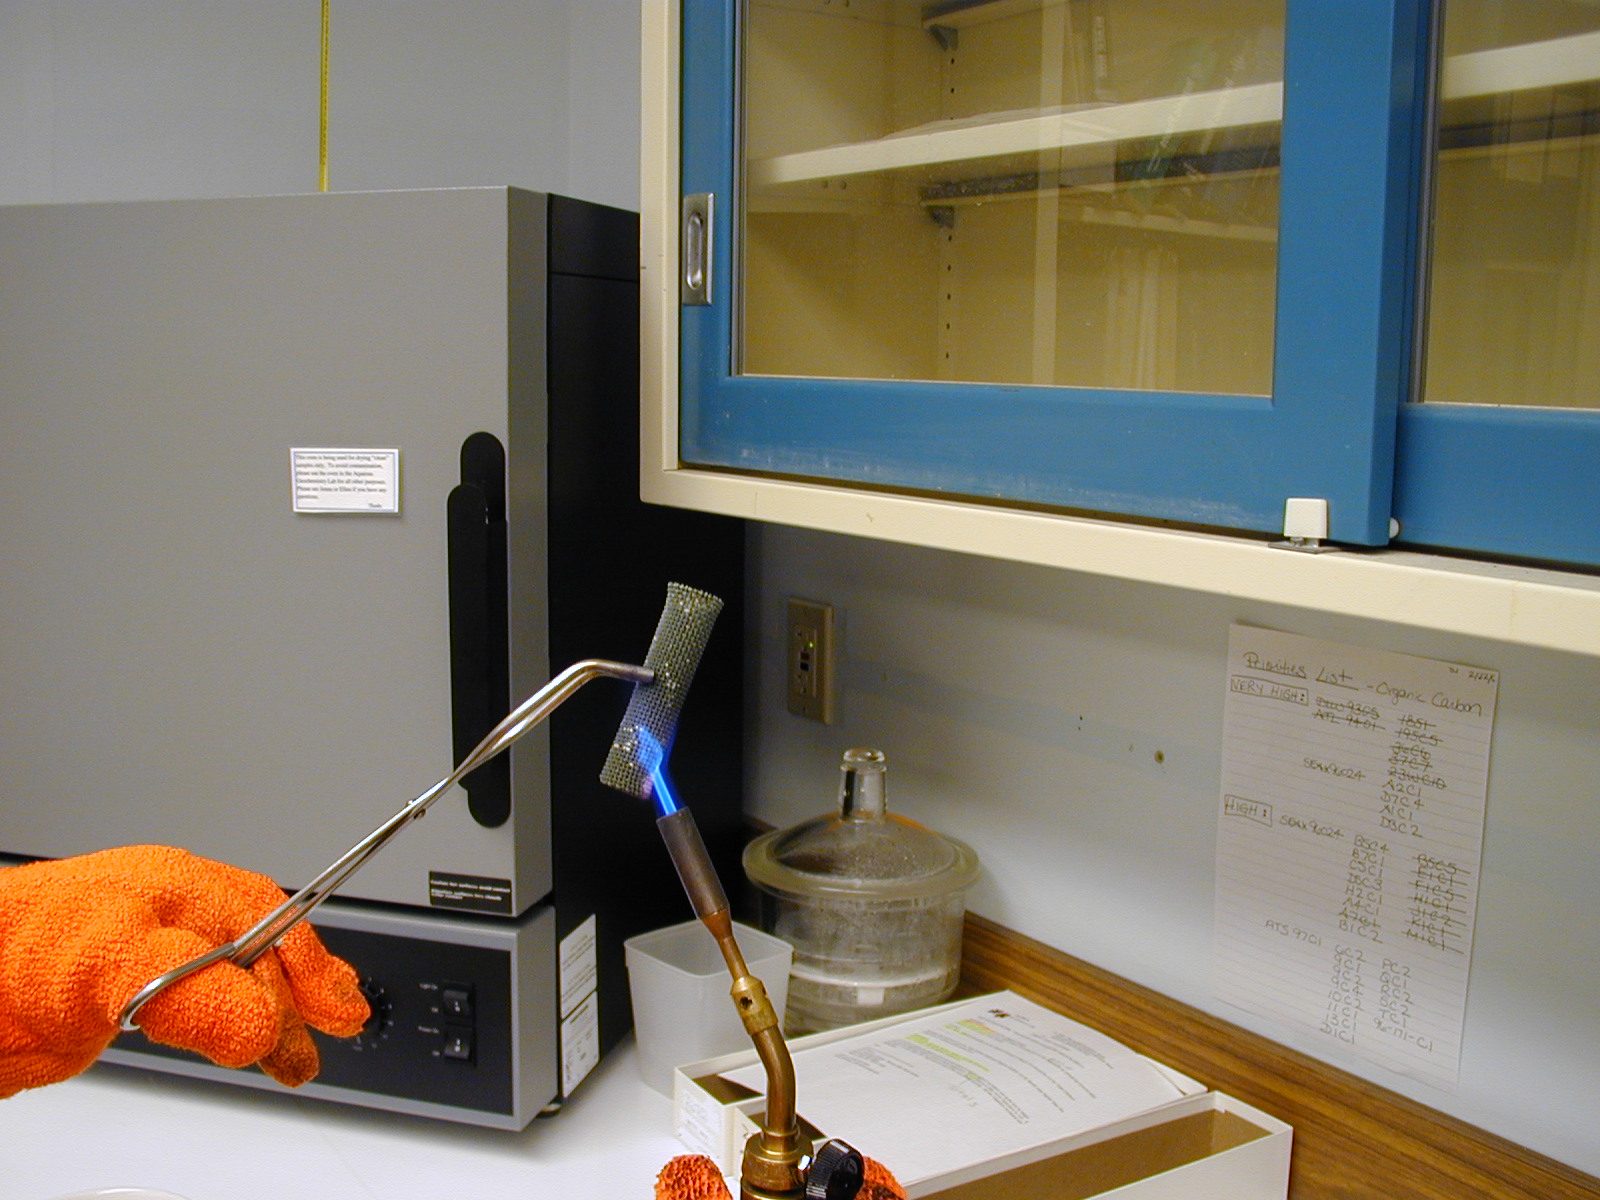
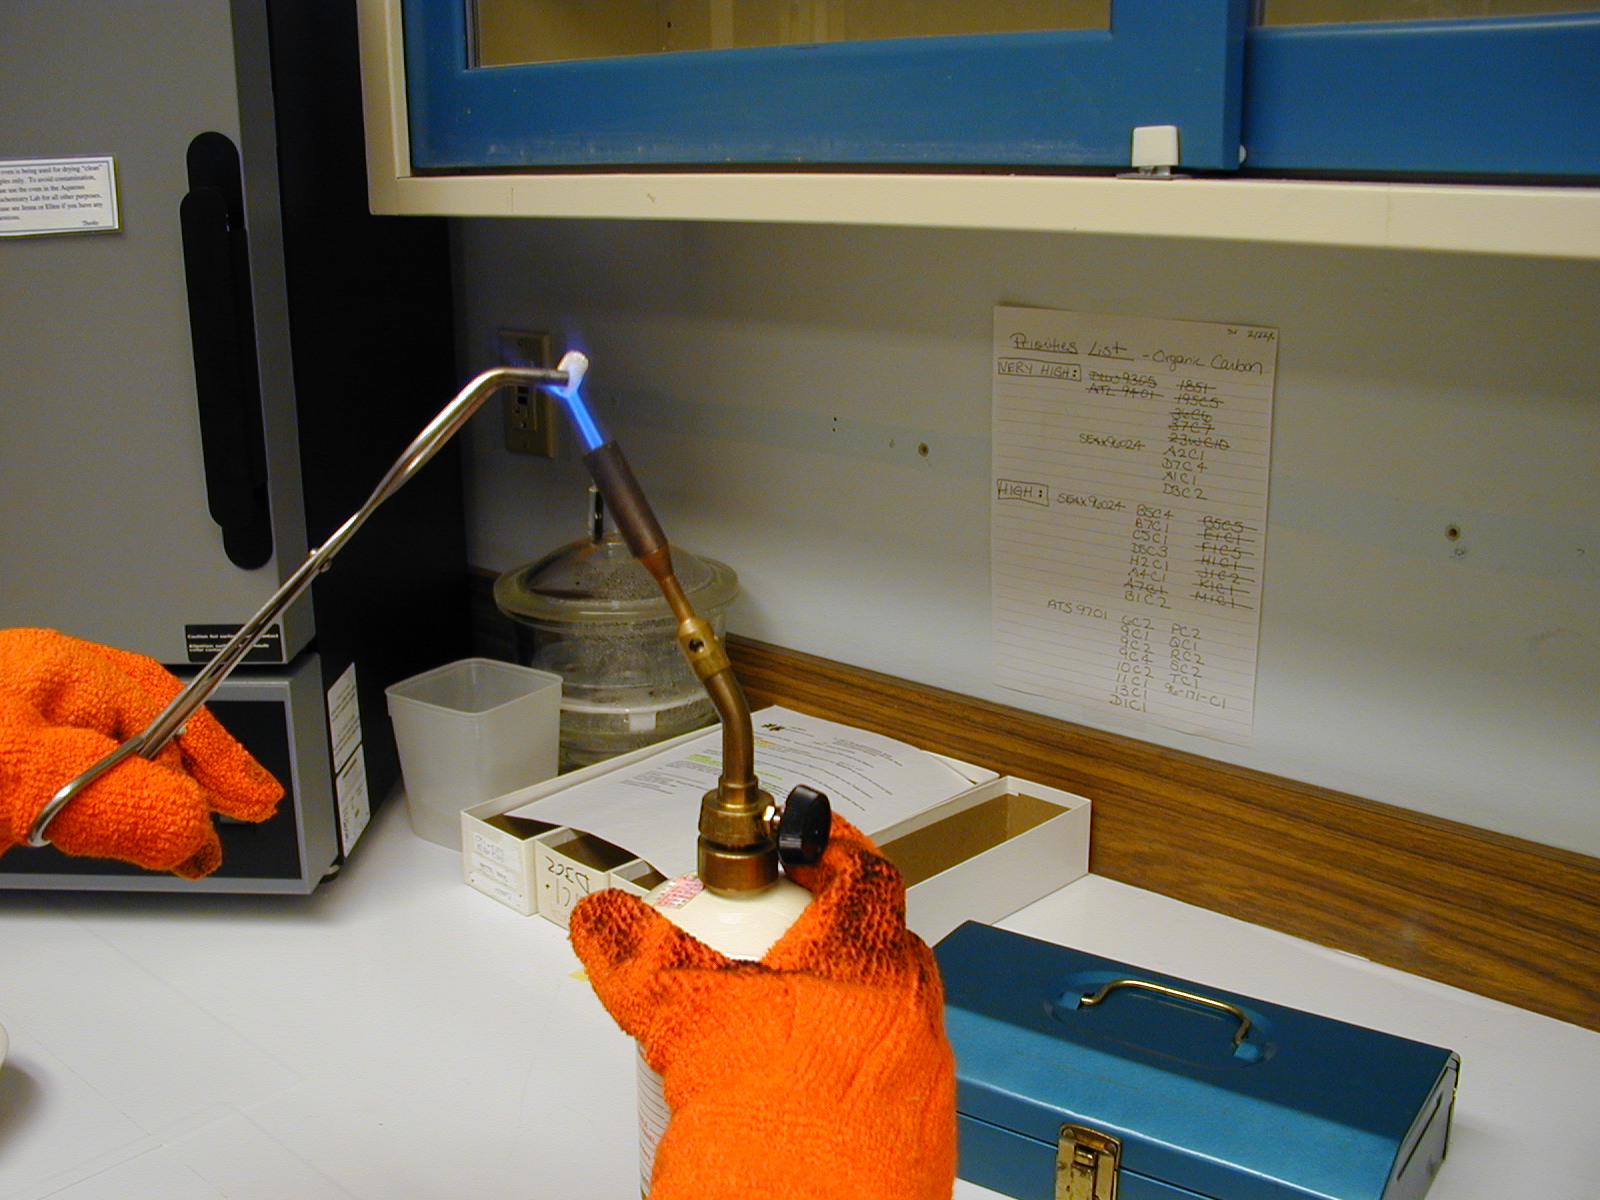
Remove the silver gauze from the sonicator. Assemble the propane torch, turn on the gas, and light the torch. Hold the silver gauze with the tongs and fire it until it turns back to a clean, silver color. Place in the ceramic bowl to cool before inserting into the bottom end of the new Reduction tube. |
 |
| Carefully slide the new tube into the furnace. Replace in this order: nut, washer,and O-ring to the bottom of the tube. Replace in this order: ceramic ring, nut, washer, and O-ring to the top of the tube (shown at right). Loosen the side knobs and return furnace to the upright position. Hold bracket plate up and turn the wheel until the tops of the tubes are back in their fittings. Tighten the nuts until they are secure, but do not over tighten. Close the furnace door and secure with the screw. |
|
|
Purge the system with carrier gases for approximately 500 seconds before starting any analysis. Perform leak tests while the furnace is OFF and again when it has come up the the proper temperatures to ensure a leak-free environment. Press Diagnostics, then 2 for Gas, then 1 for Leak Tests, then 1 for the code. After a Leak Test is run for code 1, run one for code 2. If everything is functioning properly, the screen will read "Leak Test Passed" and if there is a problem it will read "Leak Test Failed" and you will have to open up the furnace, unscrew the nuts, reposition the tube, and run another Leak Test until it passes. Reset the counter by pressing PARAMETERS 4 and enter 250 for the number of runs you can get from a new Reduction Tube. |
 |
|
Follow the directions above, but now you are removing the Combustion tube which is the tube on the left side of the furnace. Carefully remove the old Combustion
tube from the furnace. Place the old tube in the proper waste receptacle. |
|
|
Empty the vial receptacle to remove the combusted samples and throw them away in the regular trash. Clean the vial receptacle
and silver gauze by sonicating and then flaming with a propane torch to
remove impurities before placing it in the new tube (see instructions
in section above). Reset the counter by pressing PARAMETERS 4, enter 900 for the number of runs you can get from a new Combustion Tube, and enter 250 for the number of runs on the Vial Receptacle. *Every time you change the Reduction Tube you should empty the Vial Receptacle. You will change the Reduction tube approximately four times before you need to change the Combustion tube. |
|
| |
 Return
to Index
Return
to Index |